
TunnelBear VPN is an easy-to-use VPN solution ideal for beginners who don't want a too technical VPN.
In this article, we explain how to set up and use TunnelBear VPN. We also answer some frequently asked questions about TunnelBear and its features.
Semperis
Employees by company size
Micro (0-49), Small (50-249), Medium (250-999), Large (1000-4999), Business (5000+)
Large (between 1,000 and 4,999 employees), enterprise (more than 5,000 employees)
Large, Company
Characteristics
Advanced attack detection, advanced automation, anywhere recovery and more
ESET PROTECT Advanced
Employees by company size
Micro (0-49), Small (50-249), Medium (250-999), Large (1000-4999), Business (5000+)
Any size of company
Any size of company
Characteristics
Advanced Threat Defense, Full Disk Encryption, Modern Endpoint Protection, Server Security
gray trunk
Employees by company size
Micro (0-49), Small (50-249), Medium (250-999), Large (1000-4999), Business (5000+)
Medium (250-999 employees), Large (1,000-4,999 employees), Enterprise (5,000+ employees)
Medium, Large, Company
Characteristics
Anomaly detection, audit logs, compliance reports and more
How to set up and use TunnelBear VPN
1. Choose a TunnelBear VPN subscription
TunnelBear VPN offers three subscription options: free, unlimited, and teams. The main difference between the free version and the two paid plans is data. With the free plan, you only get a maximum of 2 GB per month; while the Unlimited and Teams plans offer unlimited data.
In our hands-on review, TunnelBear VPN received a score of 3.1 stars out of 5.
Figure A
If you are looking for an individual plan for long-term use, TunnelBear VPN Unlimited at $3.33 per month is the best subscription for you.
However, businesses should consider TunnelBear Teams for additional features like account management and administration tools and centralized team billing, which can be beneficial for teams of three or more.
Those who are unsure about TunnelBear should try the free plan. While it is limited to 2GB per month, it provides the same performance as the unlimited version, allowing you to test whether the VPN suits your needs or not.
For this demo, I downloaded the free version of TunnelBear VPN.
2. Download and configure TunnelBear VPN
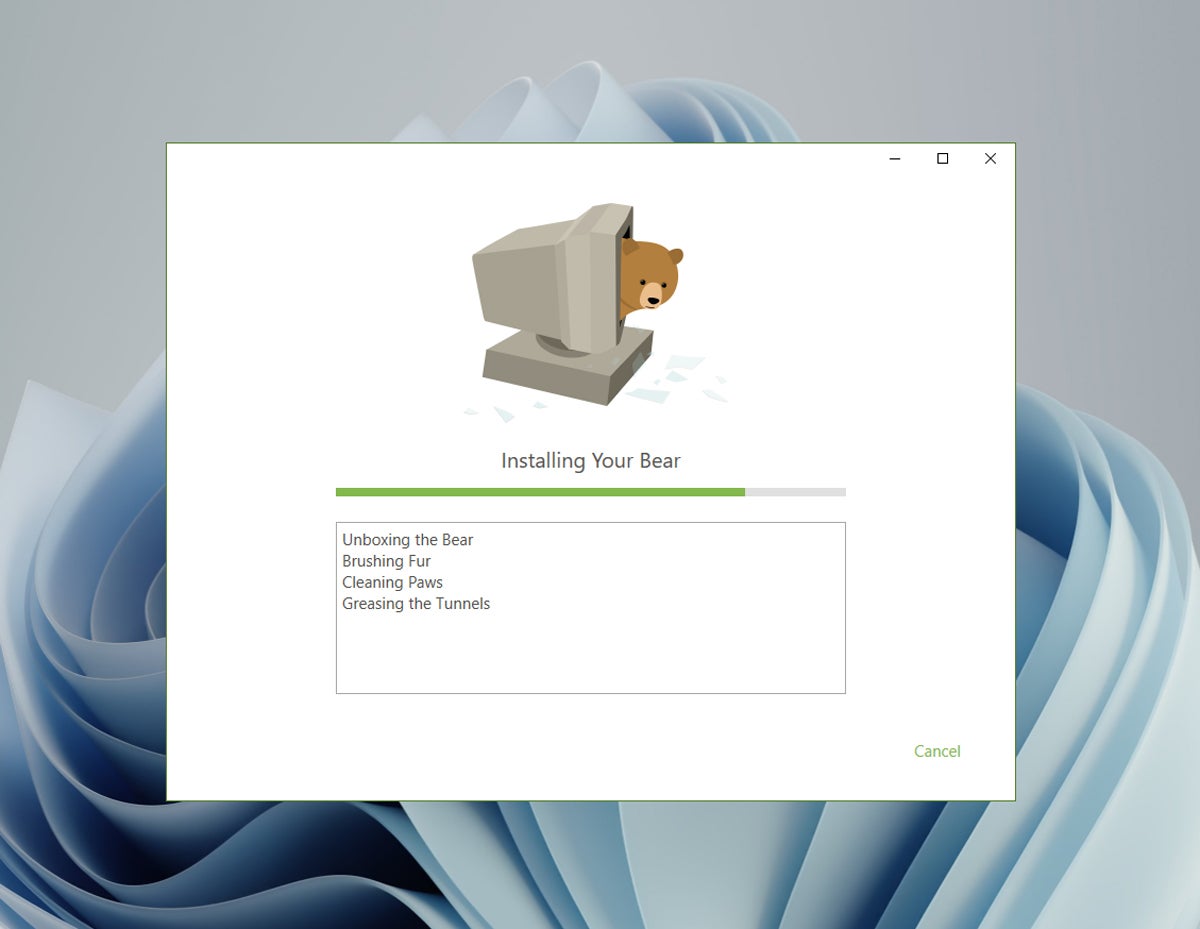
After downloading TunnelBear, I started the installation process by running the setup file. From the setup process, I noticed how TunnelBear leans towards its easy-to-use approach.
As seen in the installation screen below, TunnelBear VPN implements a bear-themed user interface that you won't find in other VPNs available on the market.
Figure B
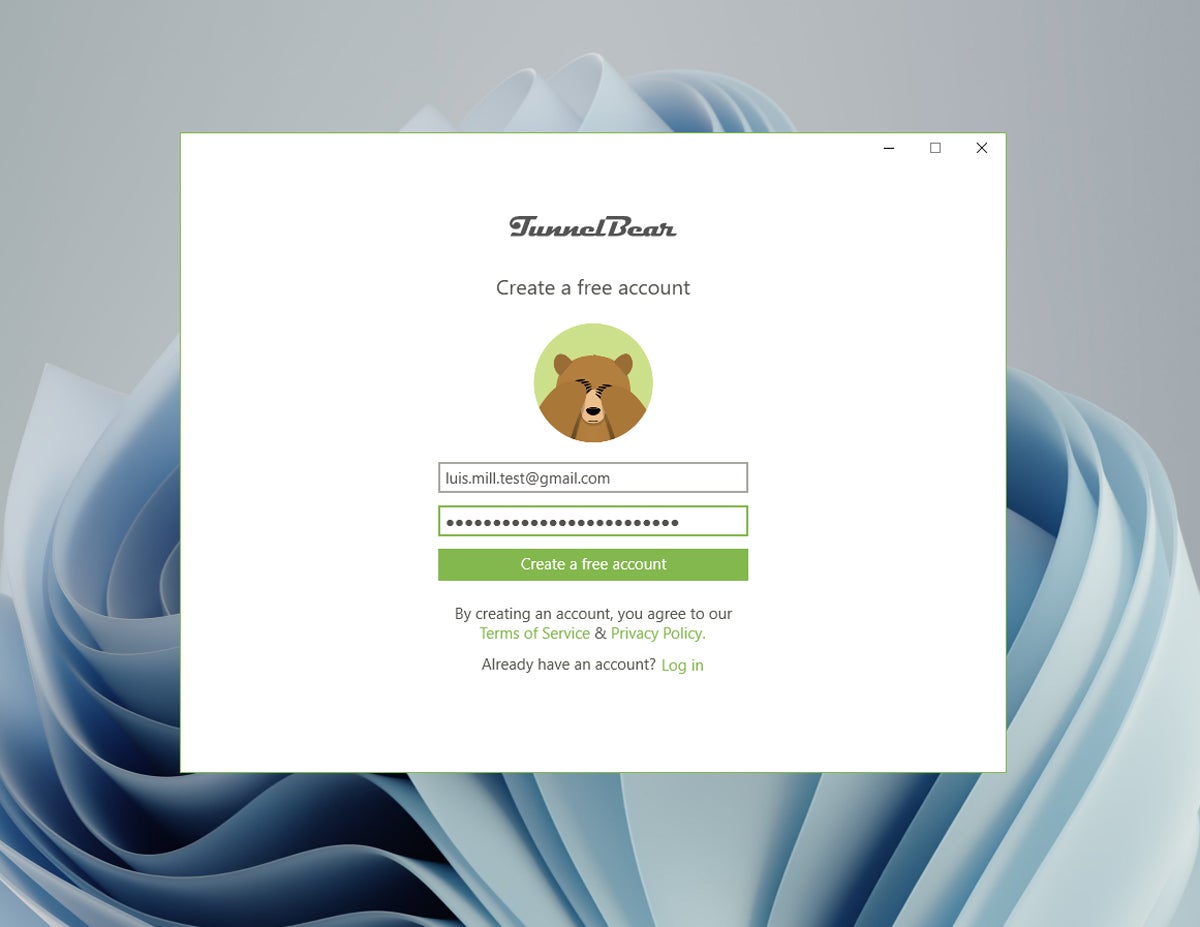
Once everything was installed, I was asked to create a TunnelBear VPN account, where I provided my email and a password.
Figure C
After creating my account and verifying my email address, slides appear giving you a brief tour of how TunnelBeal VPN protects your connection. I recommend reviewing all the slides provided.
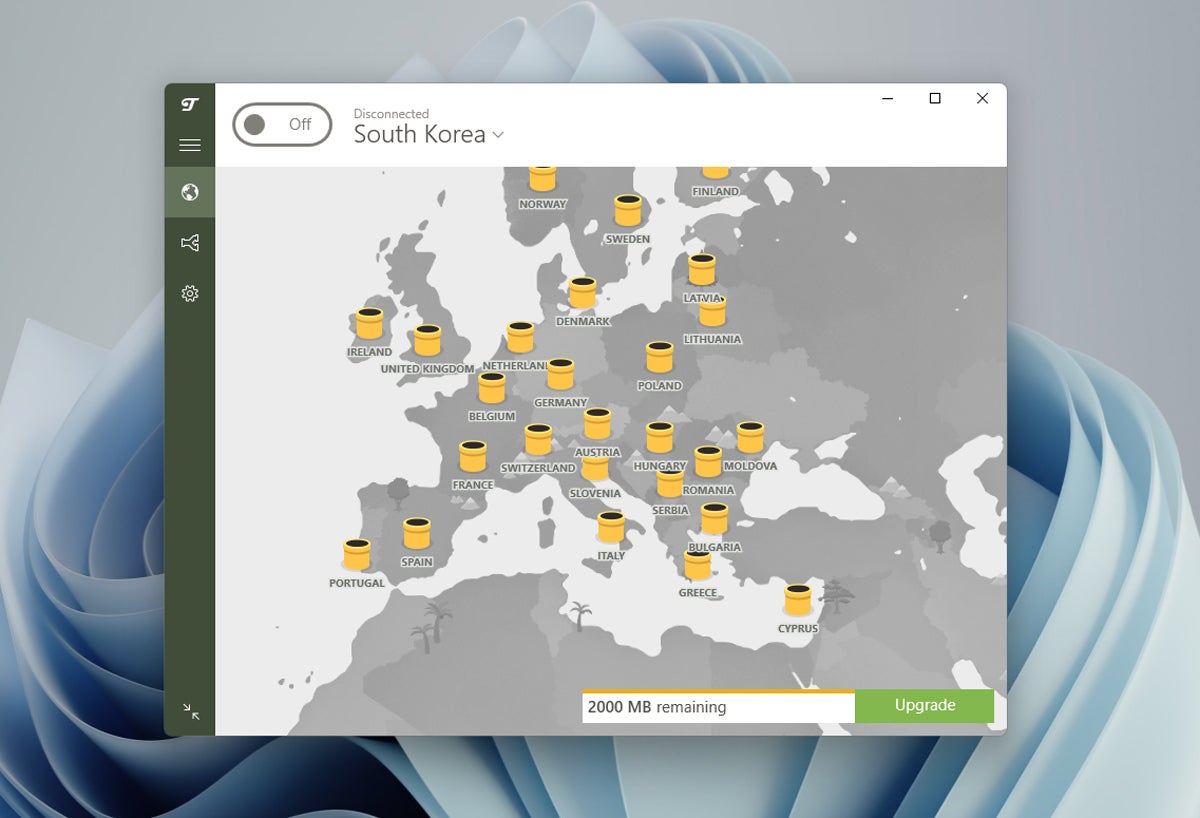
Once I finished the tour, I was redirected to the main TunnelBear VPN dashboard, as seen below Figure D.
Figure D
3. Using TunnelBear VPN
Now that I was on the main desktop panel, I was finally able to secure my Internet connection. From the main screen, the quickest way to do this is to simply click the Deactivate/Enable button at the top left of the app (Figure E).
Figure E
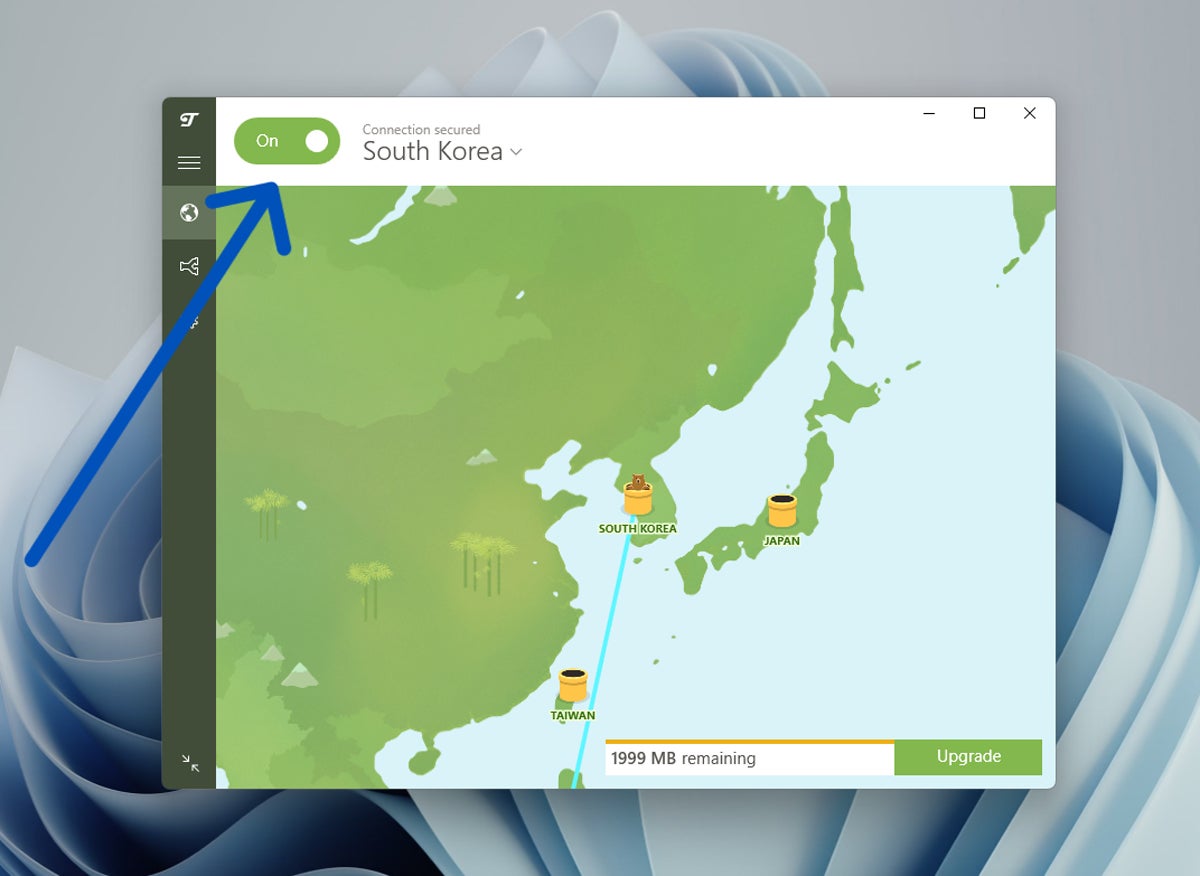
After changing the Off button to Inthe app told me that I successfully connected to one of their servers in South Korea.
At this point, I successfully connected to a secure and encrypted network, and my original IP address was changed to a different one.
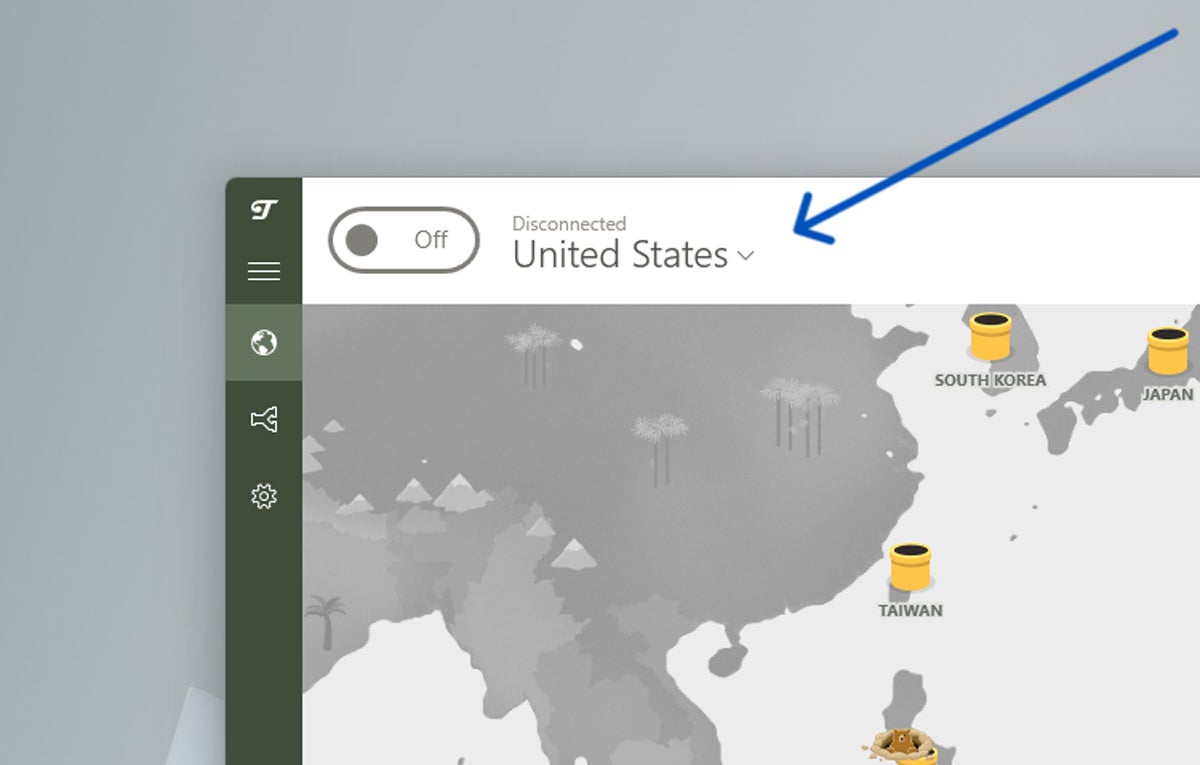
To change servers, simply click on the Arrow down next to the country name at the top of the app (Figure F).
Figure F
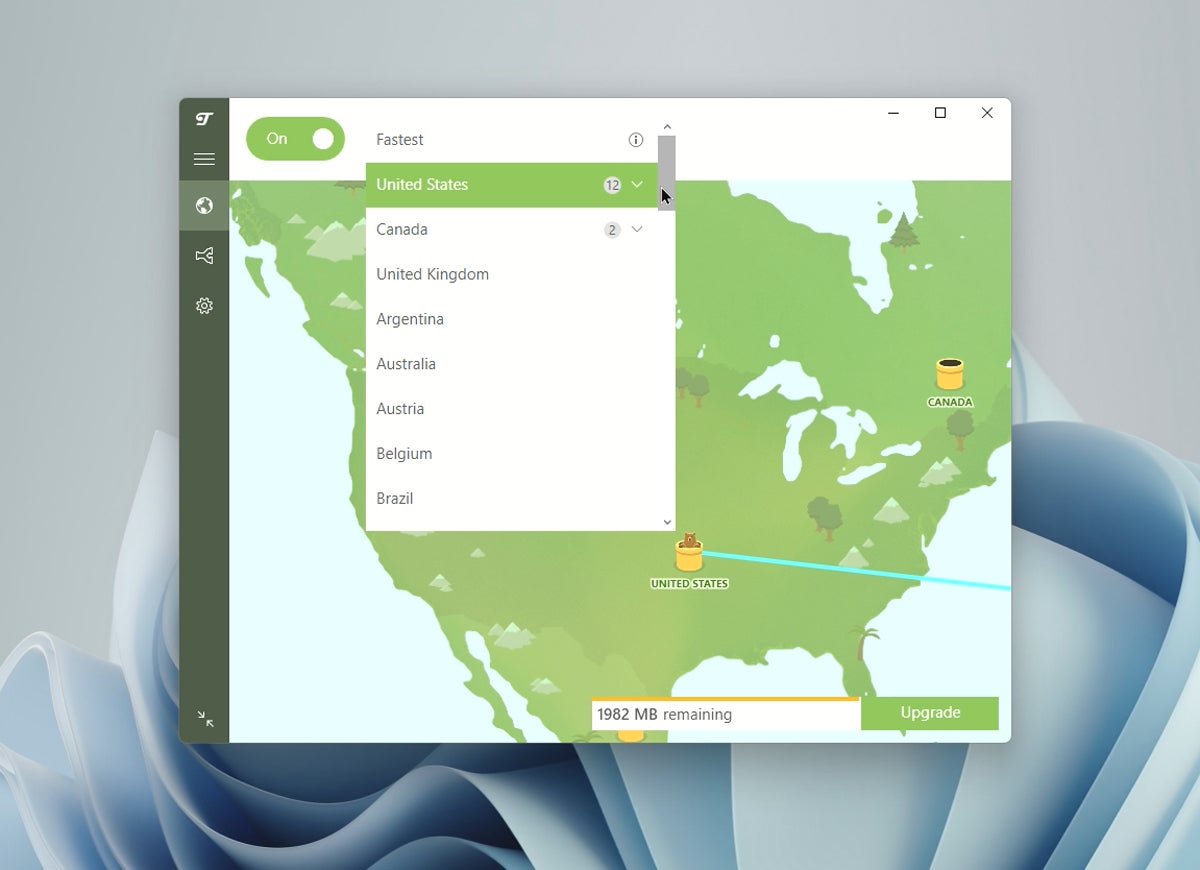
By clicking, I was able to see all the available server locations. TunnelBear also has a practice The fastest server option that automatically connects you to the fastest server available.
Figure G
There we have it, we have now connected to a secure TunnelBear VPN server!
4. Using SplitBear Split Tunneling Feature of TunnelBear VPN
TunnelBear includes its SplitBear split tunneling feature, which allows you to route certain apps or websites through your regular connection while others go through a secure VPN connection.
Since VPN protection can reduce Internet speed, split tunneling allows users to maximize Internet speed for applications that do not necessarily need high-level protection.
To use SplitBear, simply navigate to the sidebar of the desktop app and select SplitBear.
Figure H
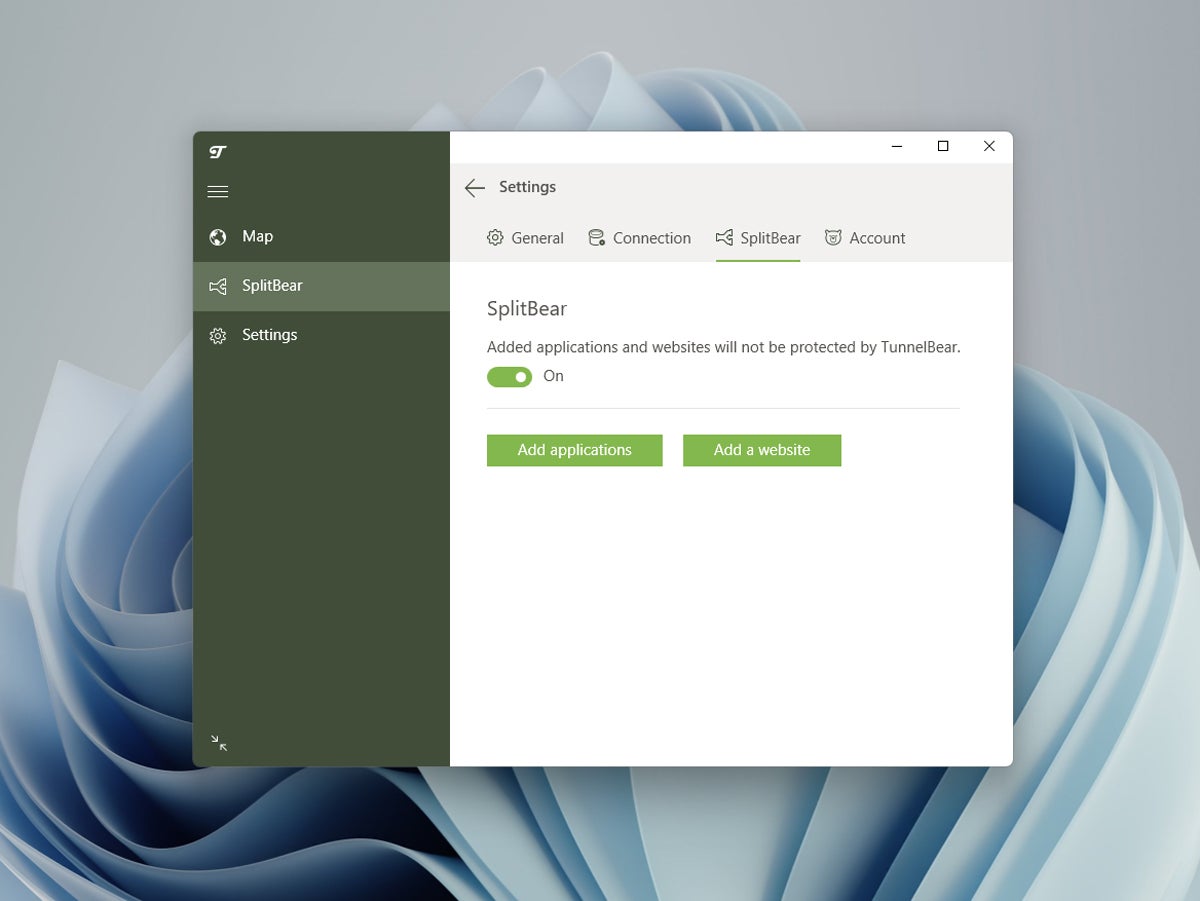
Once there, you can select apps or websites to be excluded from the secure TunnelBear VPN connection. Please note that any sites or apps chosen here will still use your regular internet connection and not one of TunnelBear's servers.
Here I chose Add apps. Then I selected Microsoft Edge as a test application.
Figure I
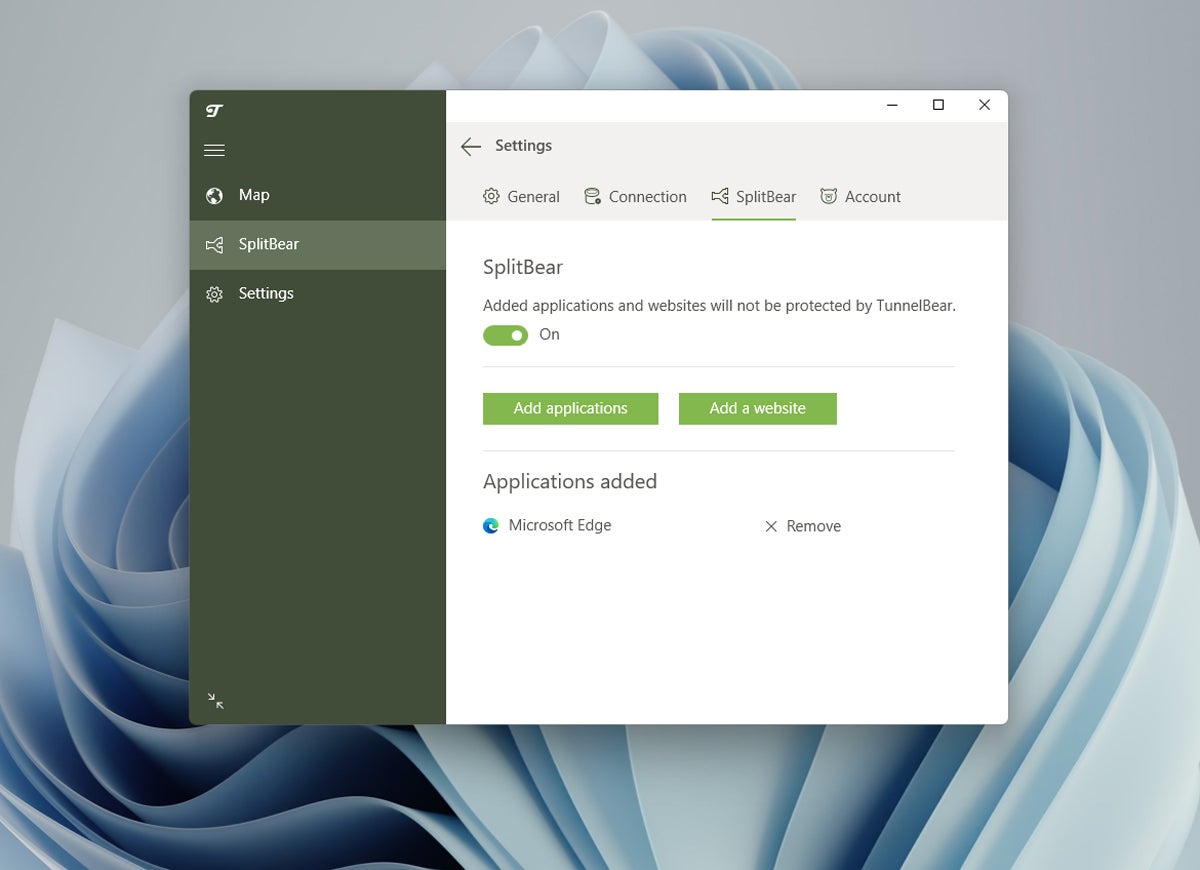
After selecting Edge, we will be able to see the applications that we have added to the SplitBear menu (Figure I). We have now successfully used TunnelBear's split tunneling feature!
TunnelBear VPN FAQ
Is TunnelBear VPN free?
Yes, TunnelBear VPN has a free version. However, it is limited because it only allows a maximum of 2 GB per month. This means that it is not a realistic free VPN solution that you can use in the long term.
If you're looking for a totally free VPN solution, I recommend taking a look at our roundup of the best free VPNs in 2024.
For users considering any of TunnelBear VPN's paid plans, their free version is still a good way to try out their software.
What operating systems does TunnelBear VPN support?
TunnelBear is compatible with Windows and macOS.
It also has equivalent mobile apps for iOS and Android smart devices.
Does TunnelBear VPN have a browser extension?
Yes, TunnelBear has browser extensions for Chrome, Edge, and Firefox.
Please note that the browser extension only encrypts your traffic for that particular browser. This is unlike full desktop or mobile VPN apps that encrypt all traffic on your device.
How do I know if TunnelBear is working?
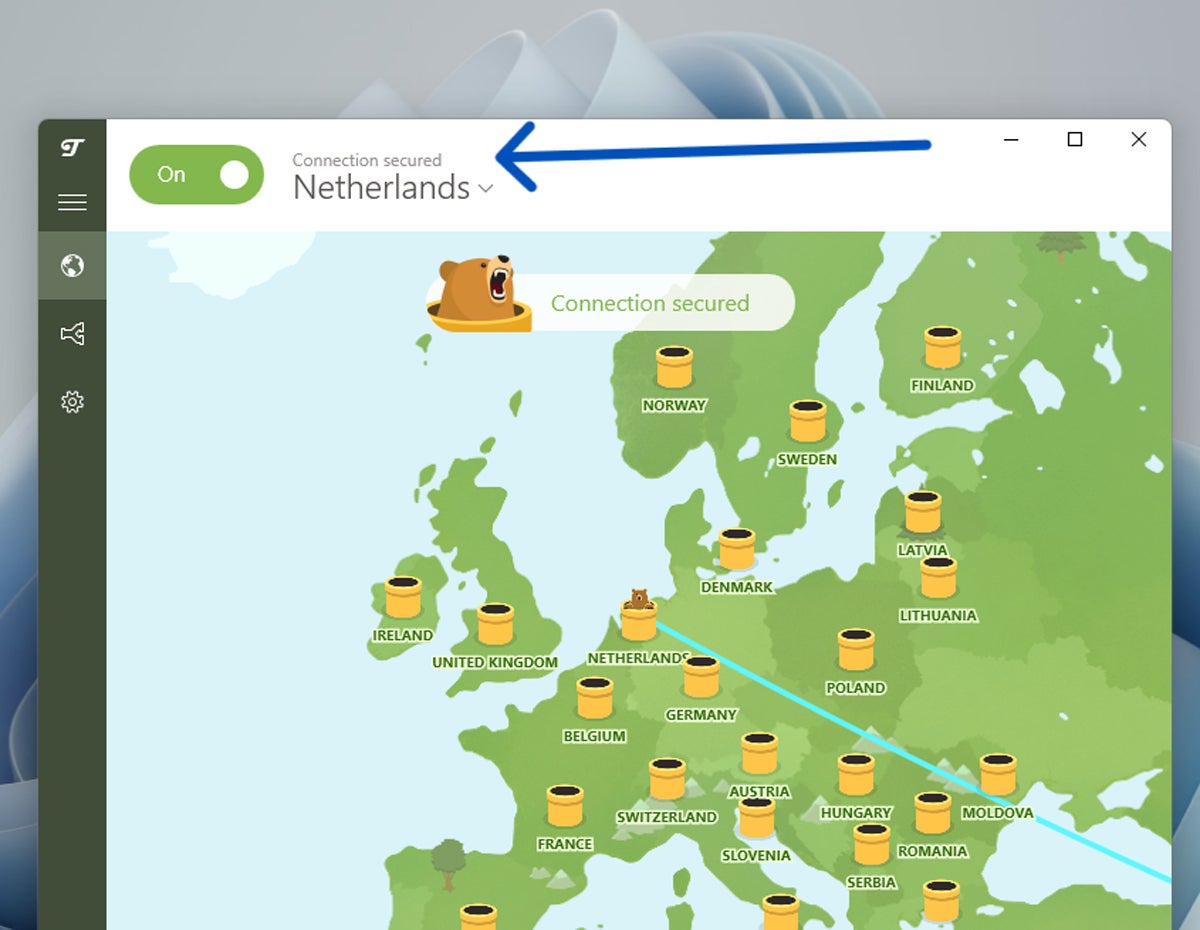
To check if TunnelBear is working, I recommend looking at two things. First, check the connection status within the desktop app. If you look above the country name, you will see if your connection is secured or disconnected (Figure J).
Figure J
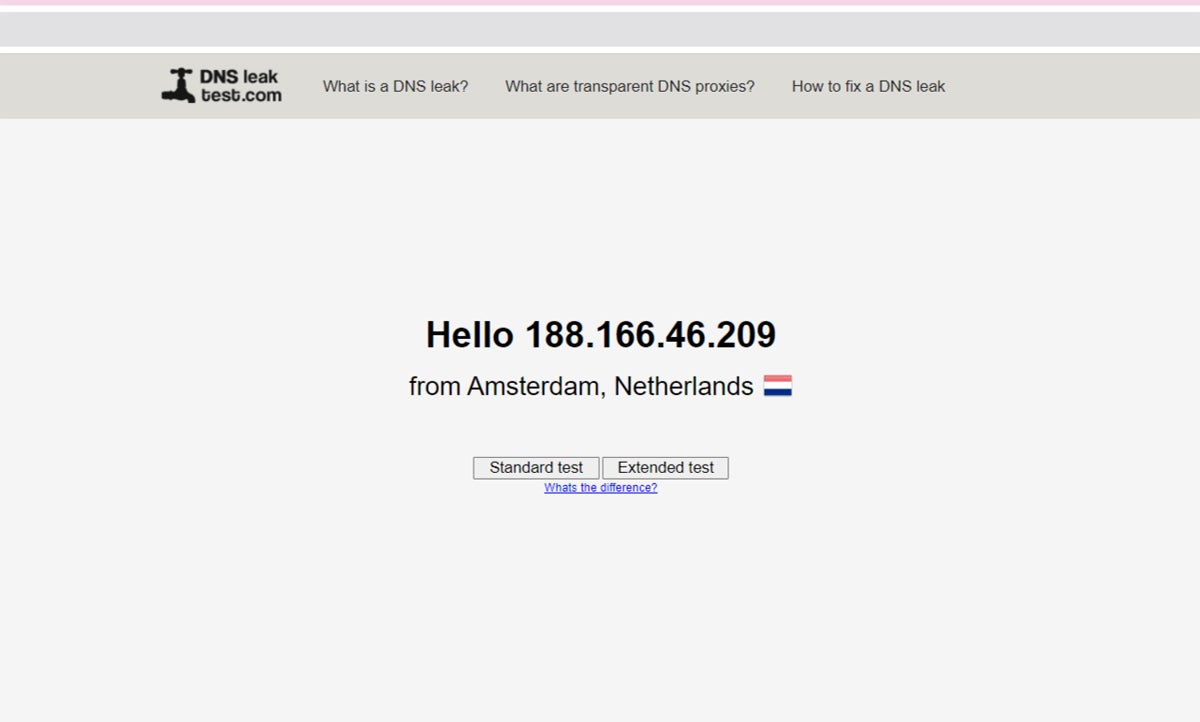
The second thing you should check is whether your IP address was successfully changed after selecting a TunnelBear server. To do this, you can use a public DNS leak testing tool. For this demo, I used DNSleaktest.com, but there are many similar sites you can try online.
Since we connect to a server located in the Netherlands, the location of your IP address should reflect the same location.
Figure K
What if I have problems with TunnelBear VPN?
If you are having problems with TunnelBear VPN, you can visit their official help page, which has support articles and guides for common problems. They also have a virtual chatbot assistant that can help answer basic questions about their service.
For more urgent issues, you can contact the TunnelBear support team through their online ticketing system. This can also be found on your main Help page.
What we think of TunnelBear VPN
In our full review, TunnelBear VPN scored 3.1 out of 5 stars. We highlight your desktop app with bugs and slower speeds for the lowest score.
Despite this, we liked TunnelBear VPN's fun and unique bear-themed user interface, which sets it apart from other VPNs available today.
If you want to learn more, read our full TunnelBear VPN review and analysis here.